| View |
|---|
|
Message Display and Sorting Message Headers Message List Columns Character Set Viewer Profiles Global View Mode RFC-822 Headers Use Plain Text Viewer Using the View menu you can change the display of certain program areas. 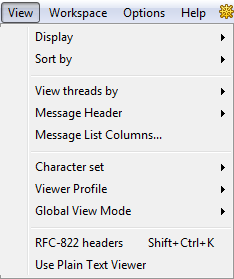
Message Display and Sorting When viewing messages you might need to display only those messages that satisfy certain conditions. To configure message display use the View -> Display menu. 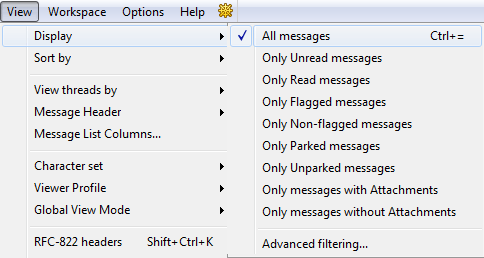
By default The Bat! shows all messages in the list. Select one of the available options to display:
To display all messages again press the Escape key or the Ctrl++ key combination. Using the View -> Sort By menu you can configure message sorting by one of the criteria:
Tip: To sort messages by a criterion, just click the respective column in the message list and the program will automatically sort them by this column. To display messages in the descending order, click the column once again. You can also group messages into threads. Messages having common attribute will be displayed in one thread once you select the respective option in the View -> View threads by menu:
You can group threads by date (Alt+-). If you use this option, threads will be displayed in groups: Today, Yesterday, This week, Two weeks ago, Last month, Two months ago, etc. Tip: To expand or collapse all threads in the message list use the Shift+Ctrl+* key combination or press the * sign on the numeric keypad. To expand or collapse all the branches of the current thread use the Ctrl++ and Ctrl+- key combinations. To expand or collapse the current branch of the thread, use the + and - keys. You can configure threaded view using View Modes as well. Message Headers Using the View -> Message Header menu you can configure the display of message headers. Select those headers that should be shown on the headers pane. If you right-click message body and choose "Headers" from the context menu you can also enable the needed headers. To edit headers select the "Edit Headers" option. Using the Options -> Preferences -> Viewer/Editor -> Message Headers menu you can open the header settings as well. If you do not want to see message headers, you can hide the headers pane disabling the "Show" option in the View -> Message Header menu. Message List Columns To configure message list columns, access the View -> Message List Columns menu: 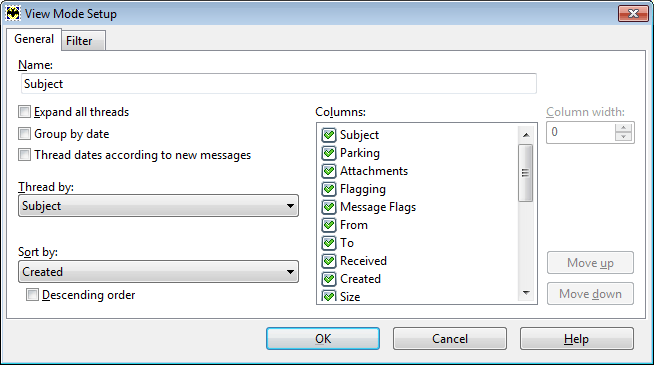
In the Columns field select the columns that should be displayed when viewing message list. For example, you can disable the To column for the Inbox folder that stores messages sent to you. You can change the column width and order. To move a column, use the "Move up" and "Move down" buttons. To access column settings you can also right-click a column and select "Message List Columns". 
Character Set The Bat! displays messages using the character set indicated in the message header. If needed, you can change the character set using the View -> Character set menu or right-clicking the message body and selecting the "Character set" option. If you want to add other character sets in the list, select "More Character Sets". Viewer Profiles Using the View -> Viewer Profile menu you can select a profile to view text messages. To set up profiles select the "Manage Viewer Profiles" option. 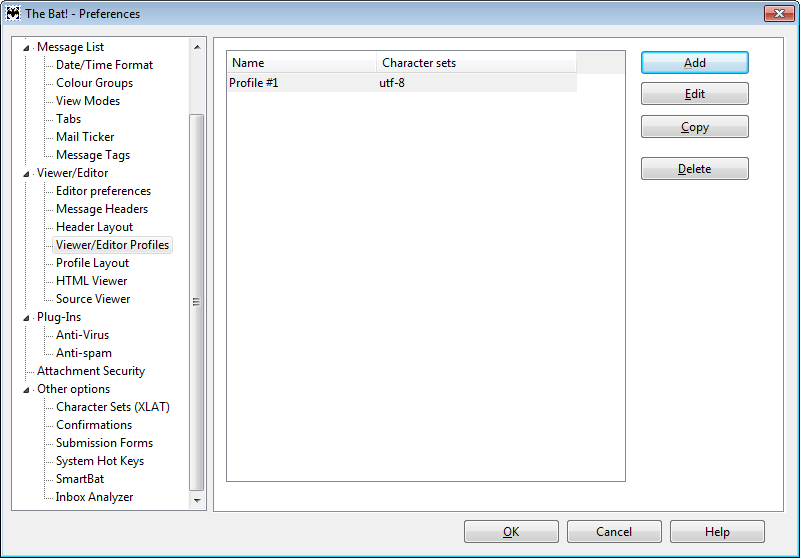
Using the Options -> Preferences -> Viewer/ Editor -> Viewer/Editor Profiles menu you can also access the viewer profiles settings. Global View Mode In the View -> Global View Mode menu you can select a view mode that will automatically be used in all folders. This view mode will be used until you re-start the program. RFC-822 headers If you enable the display of RFC-822 headers you will see these headers in the message text area. This is technical information which is used by the email client, however there is no necessity to see it. Using the Shift+Ctrl+K key combination you can enable or disable the display of RFC-822 headers. Use Plain Text Viewer If you enable the "Use Plain Text Viewer" option, the emoticon will not be displayed in the message text. You can select this option from the context menu of the message body as well. |
The Bat! Help
|
Folders (6)
Sorting Office (4)
Macros (13)
XMP macros (9)
Checking Mail (2)
Reading Messages (7)
The Bat! Tools (8)
Address Book (7)
Backup (4)
Program Options (9)
|
Program Interface
| Workspace |
|---|
|
Message Auto-view Address Auto-view Memo Auto-view Window Split Mode Quick Reply Attached Files Connection Center Toolbars Folder Tabs Message List Tabs Status Bar The Workspace menu contains the following items: 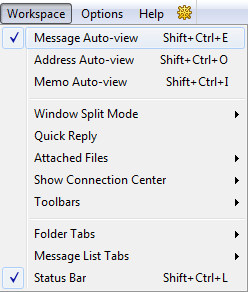 Message Auto-view To be able to read messages in the main window of The Bat! enable the "Message Auto-view" option (Shift+Ctrl+E). Address Auto-view To display the window containing the information about the sender of the selected message use the Workspace -> Address Auto-view menu (Shift+Ctrl+O). The program displays information stored in the address book. 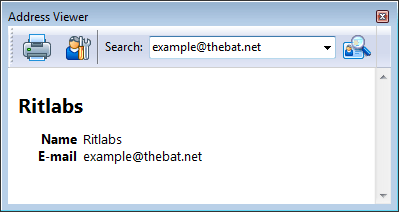 Memo Auto-view To view the memo of the selected message, enable "Memo Auto-view" (Shift+Ctrl+I). 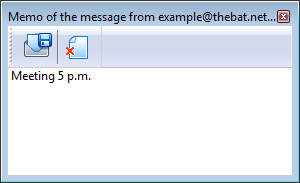 You can add a memo to the message and click Save. To see memos in the message list enable the Memo message list column. Window Split Mode The main window of the program can be divided into three sections – account tree, message list and message auto-view. Using the Workspace -> Window Split Mode menu you can choose the best way to display these sections:
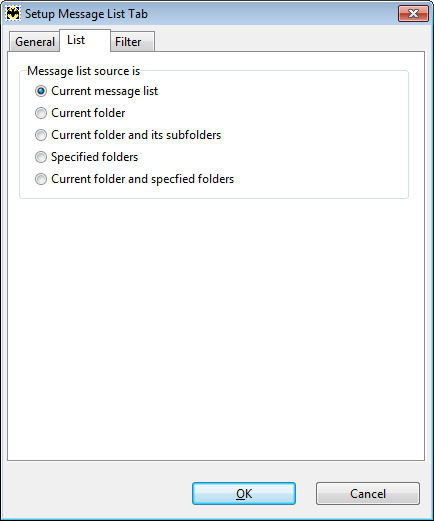
Quick Reply To enable/disable the Quick Reply pane use the Workspace -> Quick Reply menu. You will see the quick reply pane at the bottom of the message auto-view section.  Enter your reply into the field and click "Send" (Ctrl+Enter). If you need to compose the message in the Editor, use the Shift+Ctrl+Enter key combination. You can change the template for quick reply in the Account -> Properties -> Templates -> Quick Reply menu. To set up the display of the quick reply pane use the Options -> Preferences -> Other options menu. You can enable the quick reply pane for the main window of the program, separate message viewer and message finder. 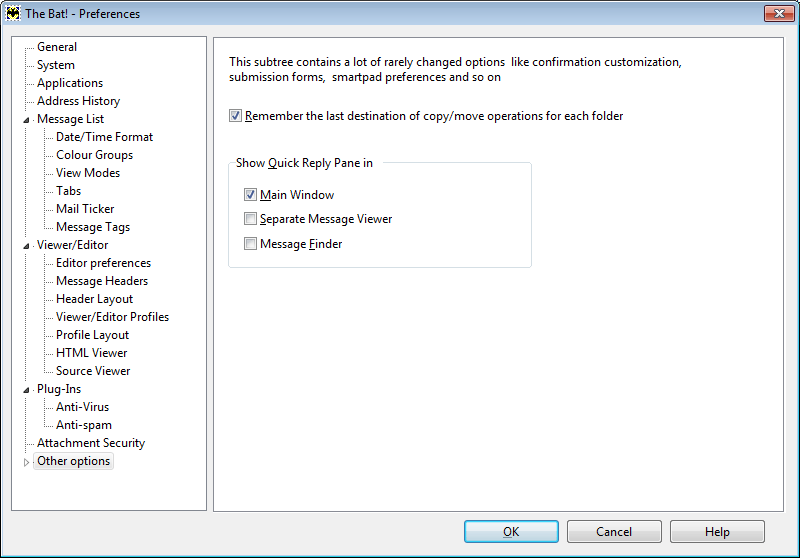 Attached Files Using the Workspace -> Attached Files menu you can set up attachment pane display.  By default, attachments are shown on the pane. If you choose the "Show as Button" option, attachments will be displayed as a button on the right-hand side of the headers pane. You can also hide attachments if desired. Attachments can be displayed as large or small icons on the pane. You can place the pane on the left, bottom, right or top of the message auto-view section. Connection Center Connection Center shows the status of the tasks that are performed during sending and receiving mail. The tasks are displayed in the queue field. You can delete these tasks from queue or abort them if there are already running. The lower part of the window displays the log containing information about the recently performed tasks. Use the scroll bar to see the entire log. In the Workspace -> Connection Center menu you can define when the connection center will be displayed: If you choose "Show Always", the connection center window will not close even if there are no running tasks; if you "hide" the connection center, it will not be displayed; if you select "Automatically", the window will automatically appear when you send or receive messages and will close when all the tasks are finished. Note: The Connection Center is always displayed in IMAP accounts as the program does not disconnect from the server. Toolbars The three main toolbars in The Bat! are: Standard, Configuration and Quick Search. The Standard toolbar displays the icons of the main program commands.  The "Get New Mail", "Send Queued Mail", "Create a new message", "Reply", "Forward" icons have a dropdown menu that appears once you click the arrow to the right of the icon. The dropdown menu of the "Get New Mail" and "Send Queued Mail" icons displays the accounts while the dropdown menu of the "Create a new message" icon offers favorite address book contacts and quick templates for new messages. The "Reply to All", "Redirect", "Address Book", "Search", "Save As", "Print" and "Delete" icons are also available on the Standard toolbar. The Configuration toolbar displays: Message Dispatcher, View Log, Set Access Password, Create a new account, Account properties, Sorting Office and Network and Administration icons.  The Quick Search toolbar displays the edit field and the "Find previous" and "Find next" buttons. If the toolbar is disabled, it will appear once you start typing the first letter of the word you search for. The cursor should be in the message list in this case.  Using the Workspace -> Toolbars menu you can disable any toolbars. Toolbars can be moved. You can, for example, place a toolbar on the left side of the account tree: 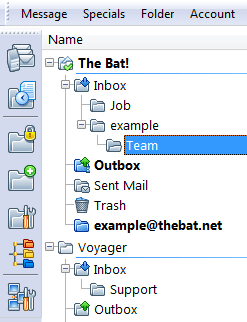 To prevent the unintentional shift of toolbars, lock them using the Workspace -> Toolbars -> Lock Toolbars menu. You can also create your own toolbar and add the desired actions to it. To add a toolbar, access the Workspace -> Toolbars -> Customize menu. Click the "New Toolbar" button and specify its name. Select the functions from the Actions field and click the right arrow to add them to the toolbar. You can change the order of the functions by moving them with the up and down arrows. You can also add a delimiter if needed. Click the "Change Image" button to change the icon for the selected action. Each action can also be renamed. Click OK to save changes – your new toolbar will appear in the main window of the program. 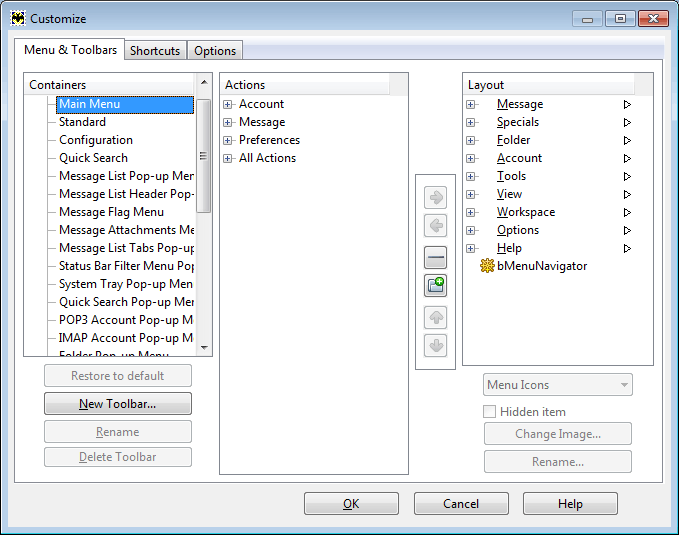 In the Shortcuts section you can check the shortcuts set for certain program actions and specify your own shortcuts. You can also remove shortcuts if needed. In the Options section you can enable the "Show button captions" option to display the captions of all the icons on the toolbars. If you enable the "Use menu icons for all toolbars" option, the toolbars will display smaller icons. If the "Simple shortcut assignment" option is disabled, then you need to double-click a menu item/action to assign a shortcut. If you enable this option, you will be able to assign a shortcut simply by pressing the desired key or key combination – the dialog will appear automatically. Note that this option works for assigning shortcuts in the “Workspace -> Toolbars -> Customize” menu only. Folder Tabs Switching between folder tabs you can display folders that satisfy certain criteria. Folder tabs are displayed at the bottom of the account tree:  The All tab is active by default. It displays all the folders of your accounts. To switch to another tab, simply click it or use the Workspace -> Folder Tabs -> Switch to menu. If you switch to the Unread tab, you will see only the folders containing unread messages. The Addresses tab is used for Address History. To hide a folder tab, select the "Hide current tab" option in the Workspace -> Folder Tabs menu. You can create new folder tabs to display certain folders selecting the "New favorite set" option. Specify its name in the General section and select the folders to display in the Folders section. In the Addresses section you can select the addresses from the address history that will be displayed under this tab. 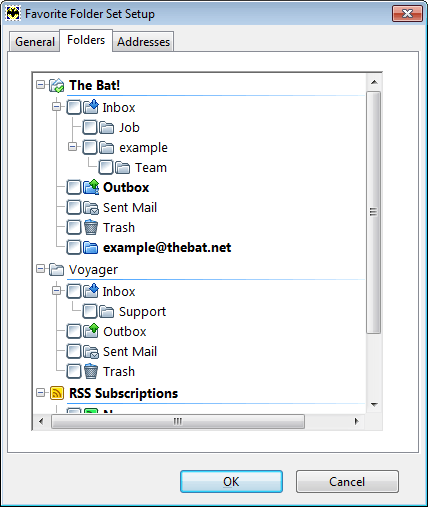 To configure the order of tabs, to hide or show hidden tabs, access the Workspace -> Folder Tabs -> Configure Tabs menu. Use the "Move Up" and "Move Down" buttons to change the order of tabs. You can also Edit or Delete tabs. 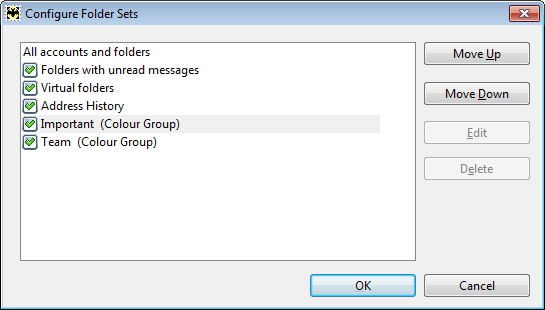 All the options from the Workspace -> Folder Tabs menu are available in the context menu of the folder tabs. Message List Tabs Message List Tabs allow displaying messages that satisfy certain conditions. Message tabs help sorting messages by different criteria. The program has two default message list tabs – All and Information. If the All tab is selected, the program displays all the messages of the current folder. The Information tab shows general information about the current account. You can create as many tabs as needed for your sorting purposes. To create a new message list tab, access the Workspace -> Message List Tabs -> Create a new Tab menu. Configure your tab specifying its name and color. You can display message list tabs in the main window of the program, in the separate message viewer and in the message finder. You can also use the needed view mode for a tab enabling the "Apply View Mode" option and selecting it from the dropdown menu.  In the List section you should define the folders to display messages in the list. You can select one of the options:
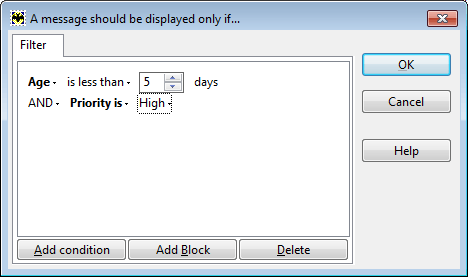
 Switch to the Filter tab to define the sorting criteria. The "Replace current message list filters" option is selected by default. If you choose the "Add to current message list filter" option the program will use both previous and current tab’s filters when you switch to this tab. For example, if the previous tab displayed unread messages and the current tab displays flagged messages, you will see unread flagged messages in the current tab. Select quick filtering criteria. If you need to configure a more complex condition, enable "Use Advanced filtering" and define the conditions of the filter. 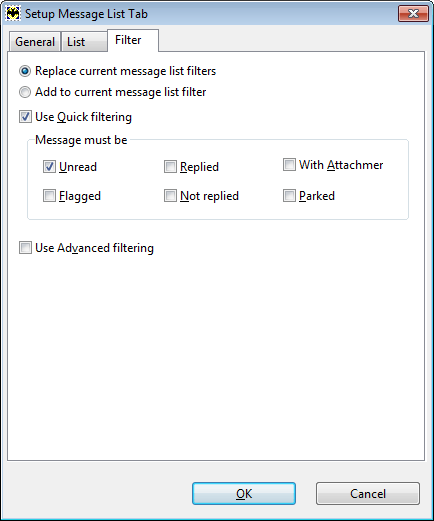 Save changes to display the new message list tab. To change its properties use the Workspace -> Message List Tabs -> Properties menu. You can also Hide current Tab.  If you added a large number of message list tabs, and they do not fit to the message list width, you can use the arrows to the left of the tabs to quickly switch between them. To hide all message list tabs, disable the "Show Message List Tabs" option. To access the settings of the message list tabs, use the Workspace -> Message List Tabs -> Configure Tabs or the Options -> Preferences -> Message List -> Tabs menu. All the options from the Workspace -> Message List Tabs menu are available in the context menu of the tabs as well. Status Bar The status bar is located at the bottom of the main window. It shows the last message from the log of the currently selected account. To enable or disable the status bar use the Workspace -> Status Bar menu (Shift+Ctrl+L). To quickly open the account log, click the status bar.  You can also use the Account -> View Log menu to open the log (Shift+Ctrl+A). |