| General Overview |
|---|
|
Make use of templates when you create messages to handle your correspondence quicker. This is especially useful when your messages contain identical parts, like greetings or signatures. Macros can make templates even more flexible. There are three types of templates in The Bat!:
The purposes of the templates also differ:
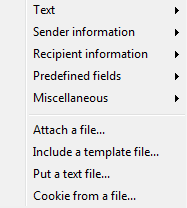
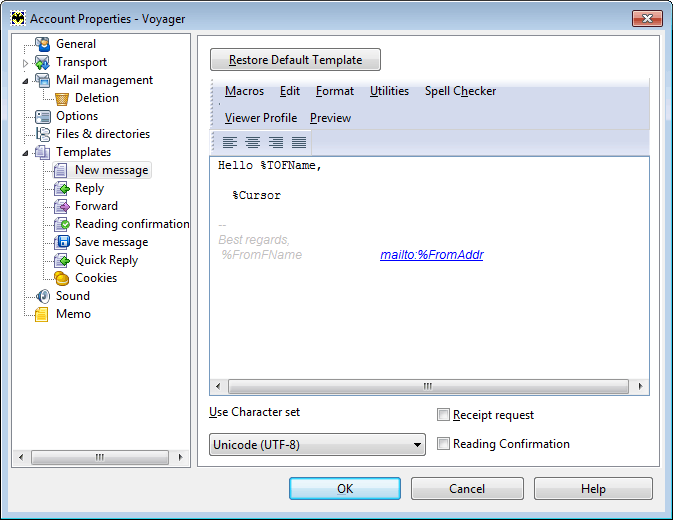
The Bat! offers default templates for each of the above categories - you can view them in the properties of your accounts and folders. If necessary, you can edit them adding or removing text and macros. Do not be afraid to make changes – you can quickly restore the default template by clicking the "Restore Default Template" button. The most frequently used macros are available in the Macros menu:
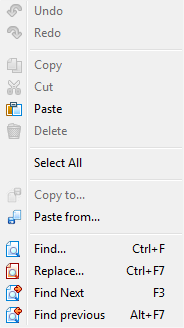
The Edit menu offers standard editor options, such as undo/redo an action, copy/paste, find and replace, etc.
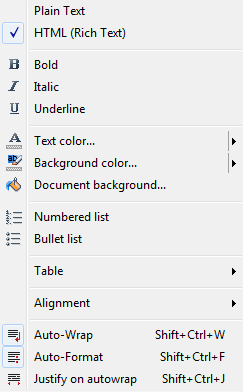
You can change the format of the template from Plain Text to HTML, and vice versa. The HTML format offers more options to edit message text, like changing its color, inserting tables and images and some more. Text alignment can be changed in the Format menu.
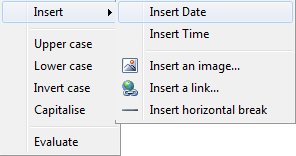
Using the Utilities menu you can insert current time and date as well as an image or a link if the format is set to HTML. You can also quickly change the case (upper – capital letters, lower – lowercase letters, invert case – letter case changes to the opposite one, capitalize – only the first letter becomes capital), and perform mathematical operations with numerical values.
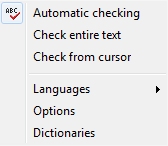
To enable and configure the spell check, use the Spell Checker menu.
You can preview the message you will compose using this template by clicking the "Preview" button.
If you need to know whether the message was actually delivered and read, enable "Receipt request" and "Reading confirmation". You can also specify the character set to be used in messages.
|
The Bat! Help
|
Folders (6)
Sorting Office (4)
Macros (13)
Checking Mail (2)
Reading Messages (7)
The Bat! Tools (8)
Address Book (7)
Backup (4)
Program Options (9)
|
Message Templates
| New Message |
|---|
|
To create a new message, click the icon To change the template, use the Account -> Properties -> Templates -> New message menu.
|
| Reply |
|---|
|
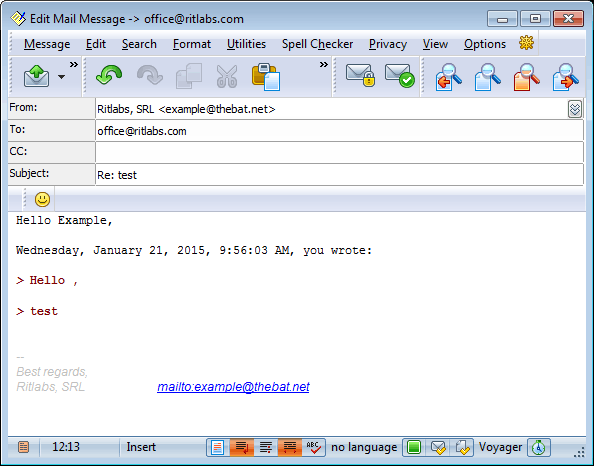
To reply to a message click the icon When replying The Bat! keeps the original message text highlighting it with a different color. You can reply to the whole message or to its parts entering the text below the quotation. In most cases, the second variant is handier than the first, the “classical” one. Once the message editor window opens, the standard reply template inserts the respective text and headers:
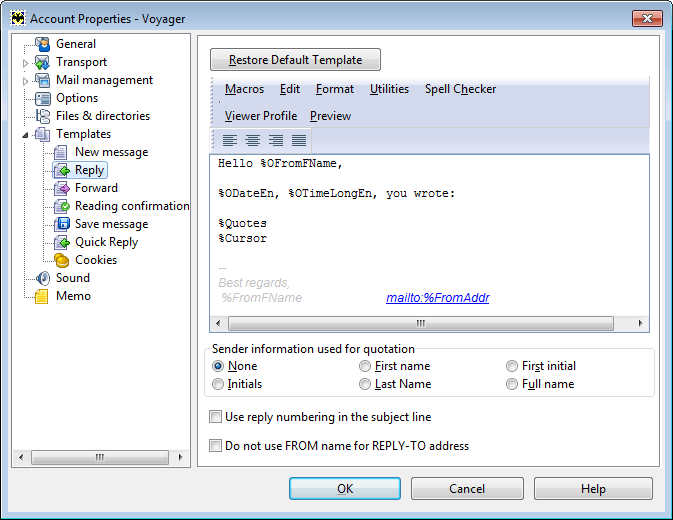
To change this template, access the Account -> Properties -> Templates -> Reply menu.
In addition to the macros described above, this template uses the following macros: %OFromFName (original sender’s first name), %ODate (original message date in the long date format), %OTimeLong (original message time in the long time format), %Quotes (quoted original text). If your template contains the %Quotes macro, the original text will be inserted with a quote prefix. It is the sign › by default. You can also add the first and last name, initials and first initial. When replying, the subject line of the original message gets the Re: prefix by default. To add the ordinal number to the prefix, for example Re[2], enable the "Use reply numbering in the subject line" option. When replying in a mailing list, the "Reply-to" header contains this mailing list address, not the original sender’s address. The Bat! uses original sender’s name and mailing list address in the "To" header when you reply in the mailing list. You can change this setting by enabling the "Do not use FROM name for REPLY-TO address" option. |
| Forward |
|---|
|
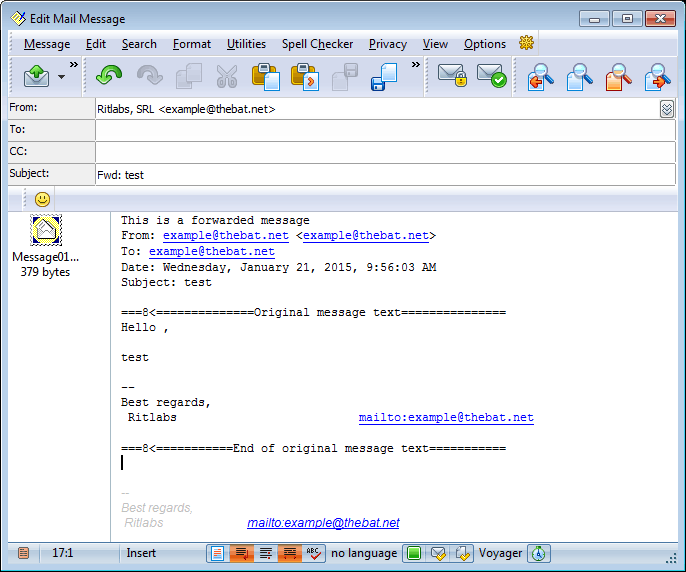
To forward a message to another recipient, use the icon The default forward template inserts the following text:
To edit the forward template, use the Account -> Properties -> Templates -> Forward menu.
In addition to the macros described above, this template includes: %OFromName (original sender’s full name), %OFromAddr (original sender’s address), %OToList (recipient list from the original message), %OSubj (original message subject), %Text (original message text). If you check the "Forward messages as attachments (MIME standard)" box, the original message will be attached as an .EML file. |
| Reading Confirmation |
|---|
|
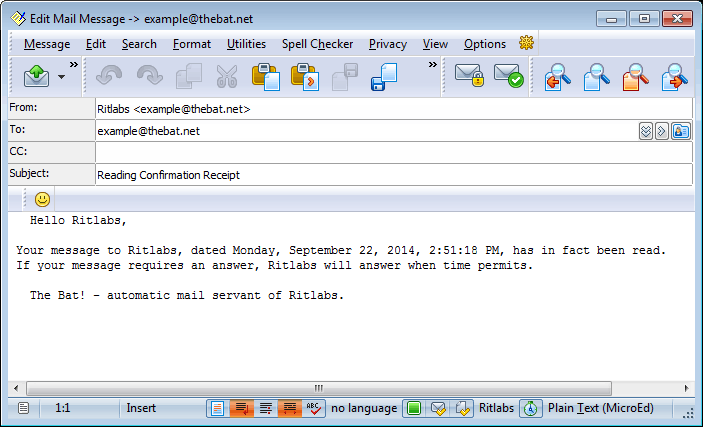
When someone sends you an email and requests a reading confirmation, The Bat! can automatically send it to your correspondent. Thus, your correspondent will know for sure that his email was actually read by you. If you get a message containing reading confirmation request, The Bat! creates the following message:
To change it, use the Account -> Properties -> Templates -> Reading confirmation menu.
Specify the action to perform: The Bat! can "put it in Outbox", "send immediately", open to "edit" or "ignore". Such confirmations are put in the Outbox folder by default and are sent with the rest of the queued mail. If you choose "Edit", the Editor window opens once you receive such a request. If you ignore reading confirmation requests, the program does not create reading confirmations. If you check the "Prompt before the Action" box, the program will ask you for action each time you receive such requests. |
| Saving Message |
|---|
|
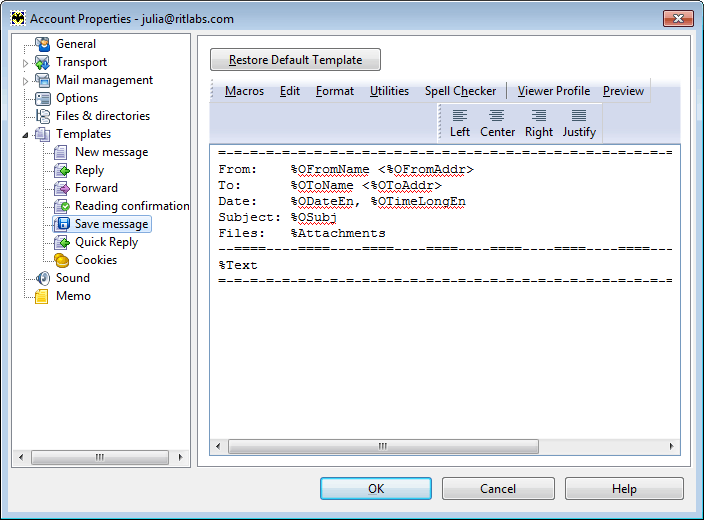
To save messages to your computer, use the icon 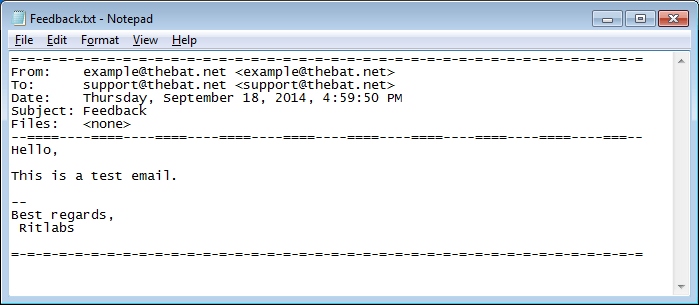
This template is available under Account -> Properties -> Templates -> Save message.
|
| Printing Message |
|---|
|
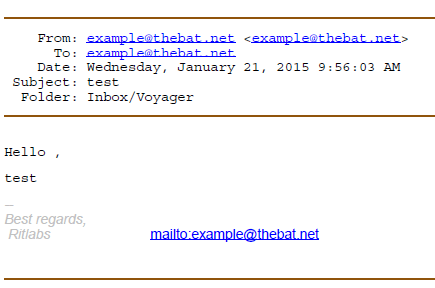
You can configure your own template for printing messages and include the information and headers you need. This is an example of a printed message using the default template:
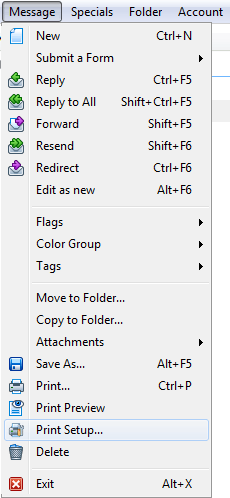
If you need to change it, switch to the Template tab under Message -> Print Setup.
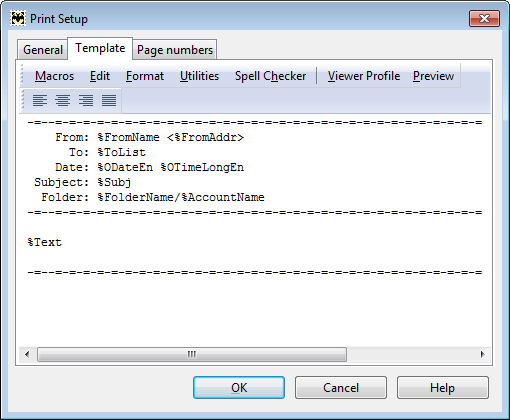
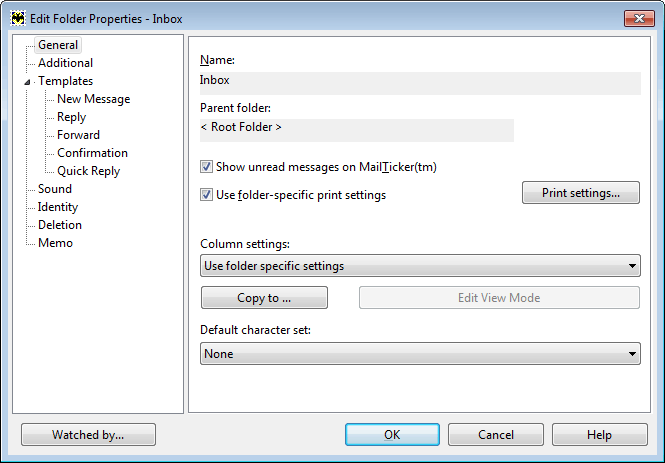
The %FolderName and %AccountName macros are used to specify the folder and the account the message belongs to. To configure the other print settings like margin size and page numbers, use the Message -> Print Setup menu. It is not possible to set your own print template for each contact or each account; however, you can define individual print settings for a folder. Select the "Use folder-specific print settings" check box and click the "Print settings" button under Folder -> Properties -> General.
|
| Quick Templates |
|---|
|
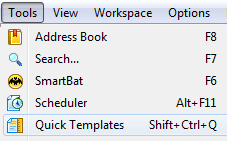
Quick Templates are text fragments that can be inserted in any message. It can be a greeting, signature, email address, postal address, company details, or any other information you often use in your daily correspondence. To create a new quick template, use the Tools -> Quick Templates menu (Shift+Ctrl+Q). You can edit or delete the existing quick templates at any time.
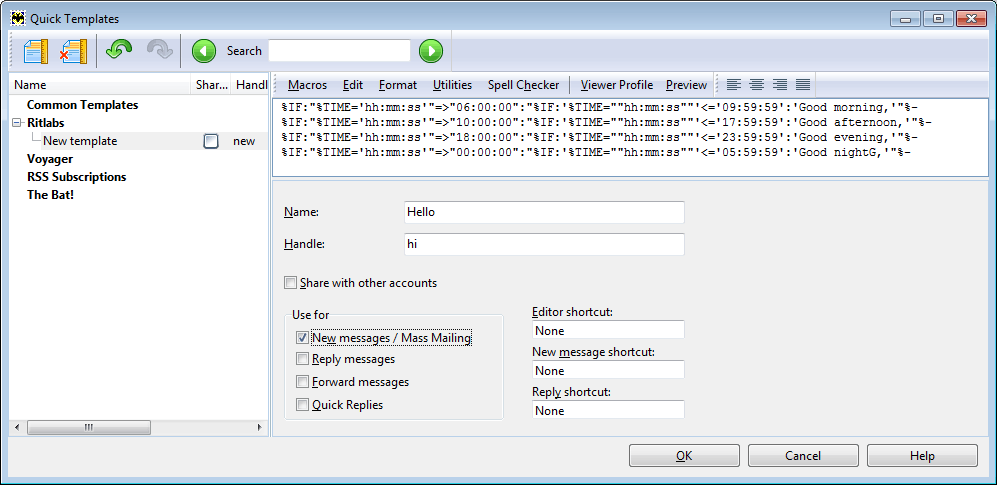
Specify the account where your new quick template will be available and click the "Create a new Quick Template" button.
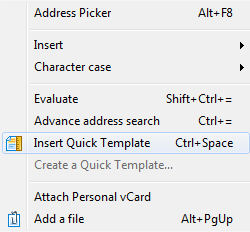
You can use the same macros in quick templates as in the standard templates. If you check the "Share with other accounts" box, this quick template will be available in all the accounts. Choose the type of messages for this template - New messages/ Mass Mailing, Reply messages, Forward messages or Quick Replies. Specify the "name" and the "handle" of the quick template. You will use the handle to quickly insert this quick template in the message text, so make sure it is short and does not contain special characters. Enter the handle in the Editor and press the Ctrl+Space key combination to make The Bat! automatically insert the result of the specified template. You can also assign a shortcut to any quick template. An alternative way to insert a quick template is to use the Tools -> Insert Quick Template menu in the Editor window; this can be useful when you have many quick templates and do not remember their handles.
This is an example of a quick template that inserts a greeting depending on the time of the day: from 6:00 till 10:00 it inserts “Good morning”, from 10:00 till 18:00 – “Good afternoon”, from 18:00 till midnight – “Good evening”, from midnight till 6:00 – “Good night”.
You can use a quick template as part of any standard template inserting the %QINCLUDE="handle" macro (%QINCLUDE="hi" in our example). If you need to change the greeting, you will not have to change all your templates. You will only need to edit one quick template, to which your standard templates refer.
|
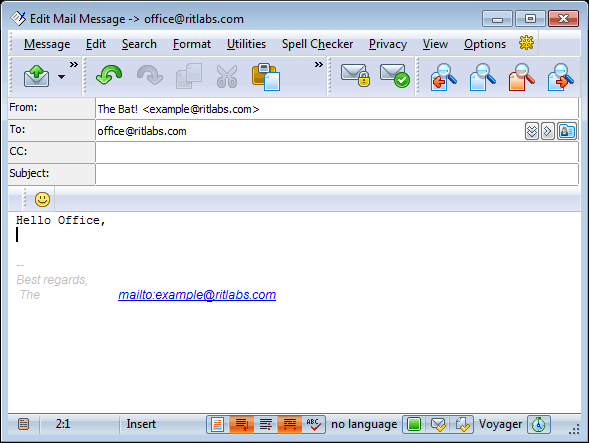
 on the Standard toolbar or use the Message -> New menu (Ctrl+N). Once the message editor window opens, the standard new message template inserts the respective text and headers:
 on the Standard toolbar or use the Message -> Reply menu (Ctrl+F5). If a message contains several recipients and you want to send the reply to all of them, click the icon
  or use the Message -> Reply to All menu (Shift+Ctrl+F5).
 on the Standard toolbar or the Message -> Forward menu (Shift+F5).


 on the Standard toolbar or the Message -> Save As menu (Alt+F5). This is an example of a message saved as a text file: