| Search |
|---|
|
The Bat! offers a handy tool to search messages. Using the Tools -> Search menu or pressing the F7 key you will open the "Message Finder" window. 
First define the search criteria in the Options section. To add a condition, click the "New condition" button. Note that if the “ALL strings should match (AND)” option is selected, the program finds messages that match all the conditions. In case “ANY string should match (OR)” is checked, The Bat! finds all the messages that match at least one of the conditions. In the lower part of the section select the folders which the program should search. To select all the accounts, click the "Select all" button. If you want to select all the folders in an account at once, use the "Select all in account" button. To quickly select folders, right-click a folder and choose one of the options from the context menu: 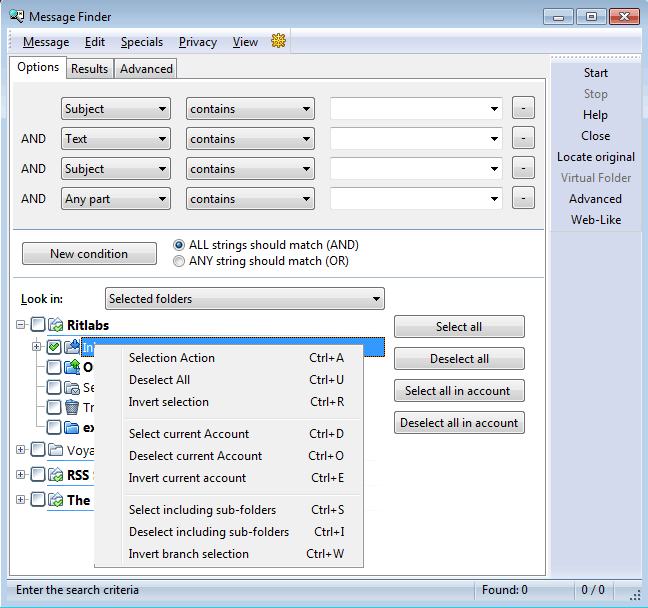
Additional search criteria is available in the Advanced section. You can, for example, search messages with flags (not replied, unread, parked), attachments or messages received within a specified period of time. You can also perform "case sensitive search" or "search for whole words only". 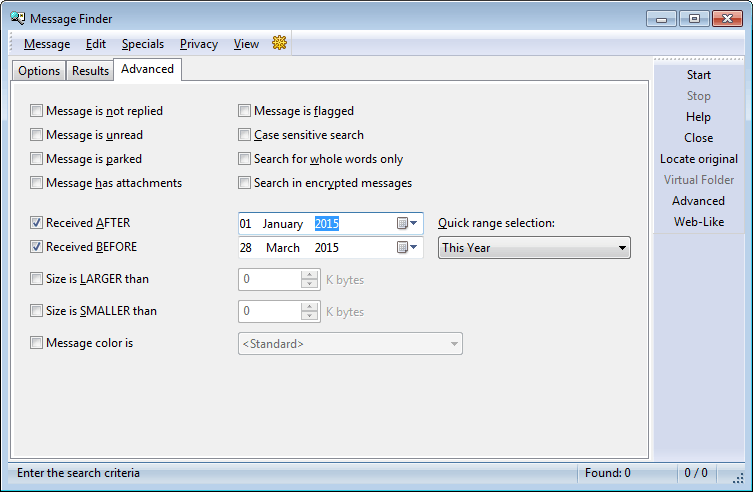
Messages that match the defined search criteria are displayed in the Results section. You can assign a view mode for the message list in this section: right-click a column title and select a view mode from the context menu. Use the View menu to configure your message list display (threads, headers, message list columns, etc.) 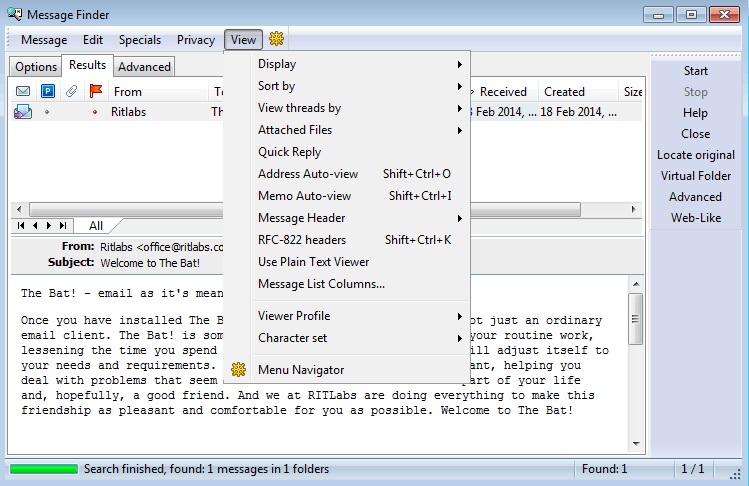
To start or stop the search process, use the respective buttons on the right-hand side of the window. To start search you can also use the Enter key. If you need to set more complex criteria, switch to Advanced search. Web-like search is also available. |
The Bat! Help
|
Folders (6)
Sorting Office (4)
Macros (13)
XMP macros (9)
Checking Mail (2)
Reading Messages (7)
The Bat! Tools (8)
Address Book (7)
Backup (4)
Program Options (9)
|
The Bat! Tools
| Image Download Manager |
|---|
|
Image Download Manager is a tool in The Bat! that takes control over the external media download.  There are 3 modes of external images download in The Bat! (see the “Options → Preferences → Viewer/Editor →HTML Viewer” menu): 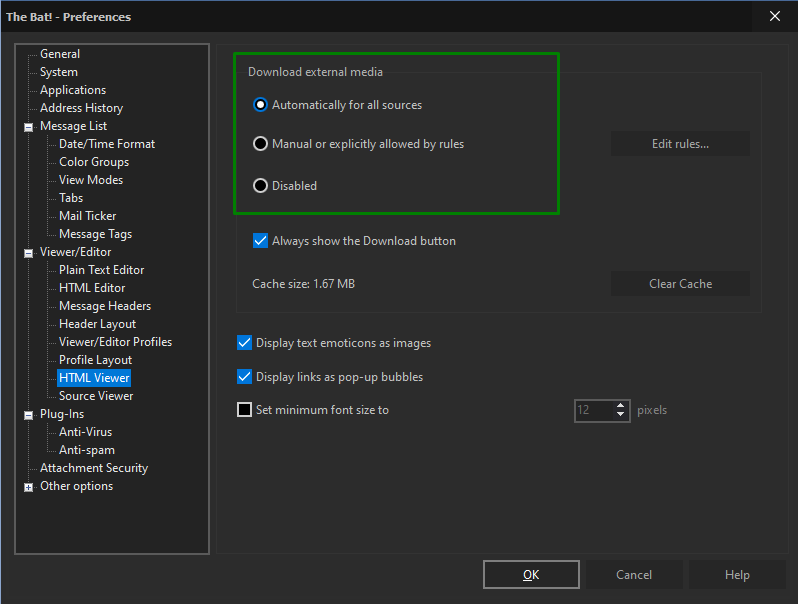 1. Automatically for all sources — if you choose this option, The Bat! will retrieve all images in the background mode. 2. Manual or explicitly allowed by rules — if you select this option, images will not be downloaded automatically. To download all images, you would need to click on the Image Download Manager icon 3. Disabled — in this case The Bat! never downloads any images in HTML emails. If the “Always show the Download button” option is disabled, the Image Download Manager icon will not appear on the headers pane if images are downloaded automatically and if the external media retrieval is disabled. However, you may enable the display of this icon and use it to download media in exceptional cases even if the automatic or manual image download is disabled. To access additional image download settings, click the arrow next to the download manager icon: 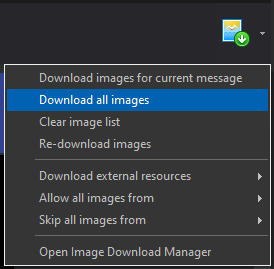 Select “Download images for current message”, to retrieve external media from the selected email only. In this case all the remote images embedded in that particular message will be downloaded into the local cache. No images will be downloaded into another message from the same sender. If you select “Clear image list”, The Bat! deletes the images which are in the download queue for the current email. You can “Re-download images” from the selected email, for example, in case the external images were replaced. In this context menu you can as well access the global settings for image download, selecting one of the options under “Download external resources”. You can also create image download rules quickly, using the “Allow all images from” and “Skip all images from” options. It is possible to allow or block external media download from certain email addresses, folder or websites in the selected email. To access the Image Download Manager settings, use the “Tools -> Image Download Manager” menu. You can add your own filters to allow or deny image retrieval by URL, folder or sender’s email address. To create a new filter, use the "Create Rule" or "New" buttons. You can delete or edit rules at any time. For example, you can block banners by URL or image retrieval in the newsletter folder. 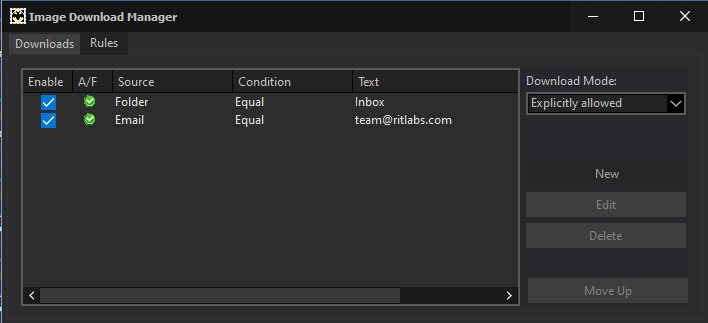 Thus, using the rules you can block the suspicious images and let the safe ones through. Image Download Manager is a tool for background image retrieval which prevents malware from reaching your computer through graphic elements of HTML messages. |
| SmartBat |
|---|
|
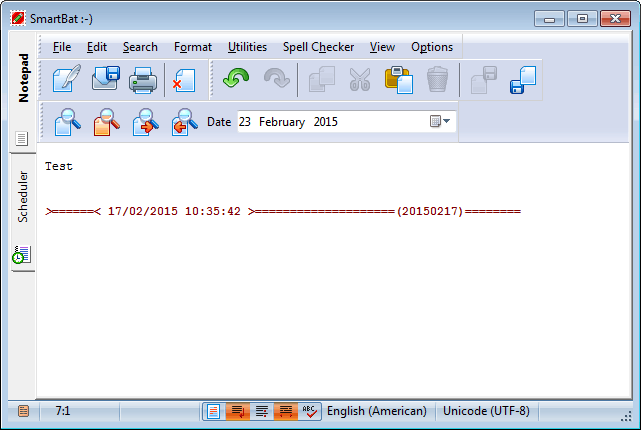
SmartBat is a small editor that allows making notes in a smart way. SmartBat maintains multiple pads, which are simple text files. Each pad is displayed on a separate tab.
|
| Scheduler |
|---|
|
The Bat! offers a simple and handy scheduler to automatically create and send emails, perform actions (like running programs or opening files), re-filter folders and much more. To access it either use the Tools -> Scheduler menu (Alt+F11) or switch to the Scheduler tab from SmartBat. 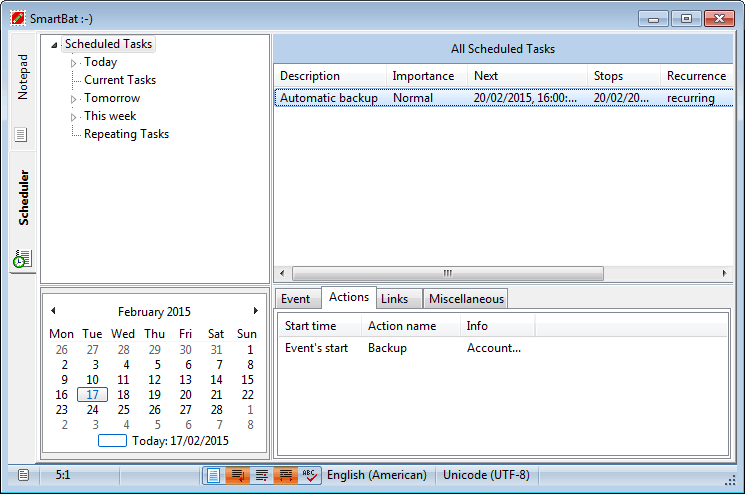
The main window of the Scheduler is divided into four sections:
Creating a Task To create a new task in the Scheduler, choose the New option from the context menu of the task list or press the Insert key. The new window will appear where you should configure the new task. Changing a Task To change the settings of a task, right-click it and select Properties (Enter). Task Properties 
Input the task name in the Description field. This name will appear in the task list. Specify the date and time of the task start. You can also define the duration of the task if needed. If you want to automatically execute this task, check the "Enabled" box. You can set the priority for any task. The high and highest priority affects the sorting in the "Today", "Tomorrow" and "This Week" groups. To get a notification before an event starts, enable the "Notify me about this event" option. Specify the time when the notification will appear. If The Bat! is not running at the time the event should start, the task will not be executed. If the "Notify about up to … missed events on startup" option is enabled, you will get a notification about missed tasks on program startup. If the "Execute actions for missed events" checkbox is selected, The Bat! will execute missed tasks. Click the "Notification parameters" button to configure the notification. 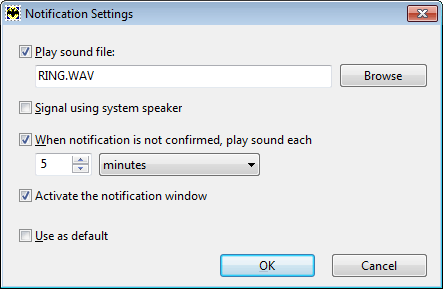
Choose a sound by clicking the Browse button. You can also enable the "signal using system speaker" option if needed. The notification sound can be played several times until you confirm it. If you check the "Activate the notification window" box, a notification window will open before your event starts: 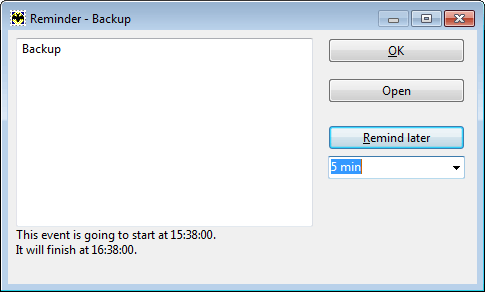
These notification settings can be "used as default" for all the new tasks. Actions In the Actions section you should specify the tasks this event will execute. You can add actions that should be performed when the event starts and finishes. 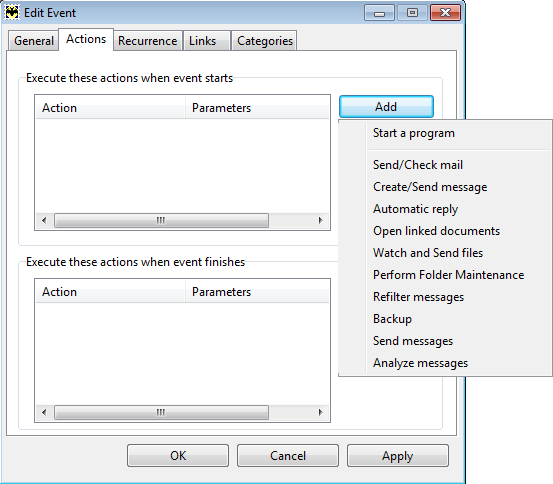
Click "Add" and choose the actions:
Some of the frequently used actions are described below.
Choose one of the available actions to perform:
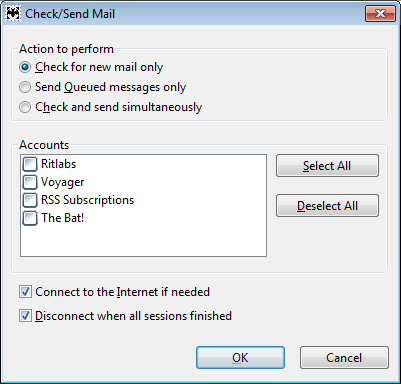
If you disconnect from the Internet, you may enable the "Connect to the Internet if needed" option. The "Disconnect when all sessions finished" option allows disabling the dial-up networking connection.
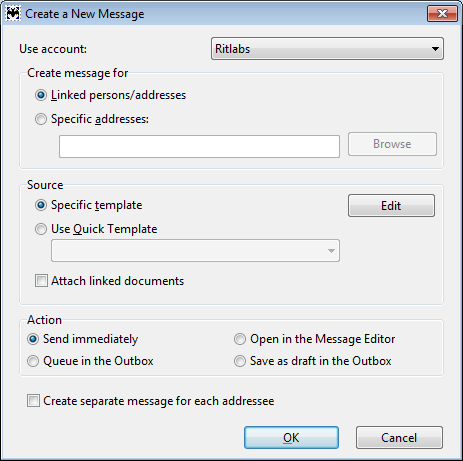
First of all you should specify the account that will be used to send messages. Select an account from the dropdown menu of the Use account section. Specify the recipients in the "Create message for" section. If the "Linked persons/addresses" option is selected, you should add the recipients in the Links section of the event. If you check "Specific addresses" you can input the addresses in the field below or click "Browse" and choose them from your Address Book. Besides this you should specify the template that will be used for the new message. Select "Specific template" and click "Edit" to create it. You can use one of your Quick Templates: select "Use Quick Template" and choose it from the dropdown menu. If you want to attach files to the message, check the "Attach linked documents" box and add them in the Links section of the Edit Event window. Specify what action to take:
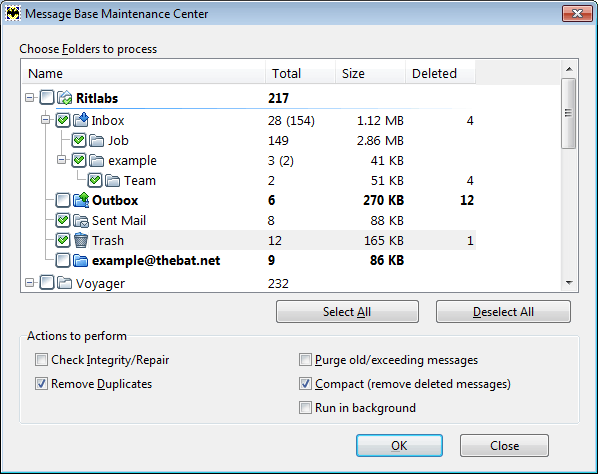
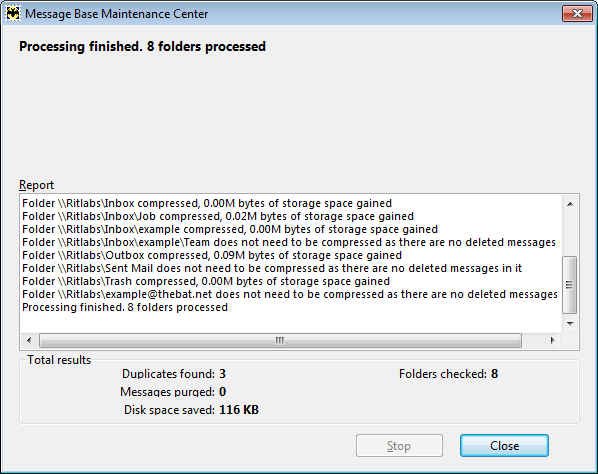
Scheduler can perform folder maintenance as well. First of all, you should select the folders to process: use the Select All/Deselect All buttons to quickly select/deselect all folders. The following actions can be performed:
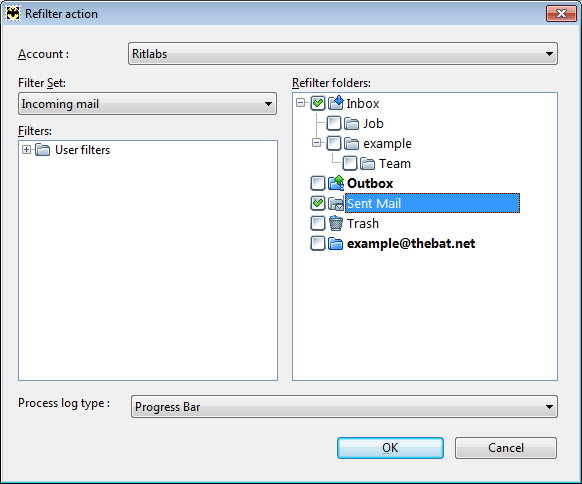
Scheduler can automatically re-filter messages. Select an account and its folders whose messages should be re-filtered. Select a filter set from the dropdown menu and mark filters to be used. Use the Account -> Sorting Office/Filters menu if you need to create new filters. You can choose between two process log types – "progress bar" or "extended details". The log can be hidden if you do not need to check the results. 
Recurrence Switch to the Recurrence tab to define when the task should be repeated. If you set recurrence you can define when the repeating will be stopped (occurrences or date).
Once you check the "Repeat this event every" box, the Advanced tab appears. Switch to it to set a more exact repeating frequency (time, days, weeks, months). For example, the program can execute the tasks on certain days of weeks or months. 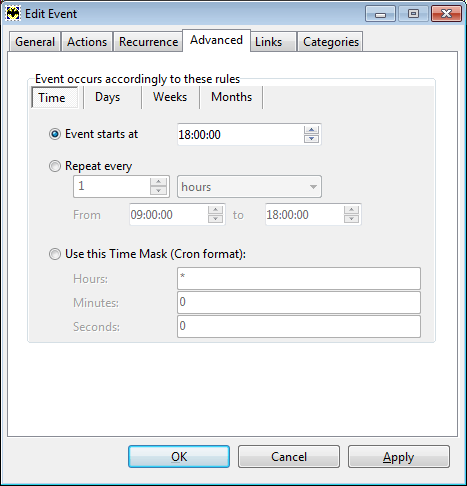
Links In the Links section you can add contacts and files that will be attached to messages. This section contains all URLs, files and address book entries associated with the task. If you use the "Remind later" command, the link to the message will be displayed in this section. You can add persons from your address book. To access a contact’s information for editing purposes click the "Edit" button. 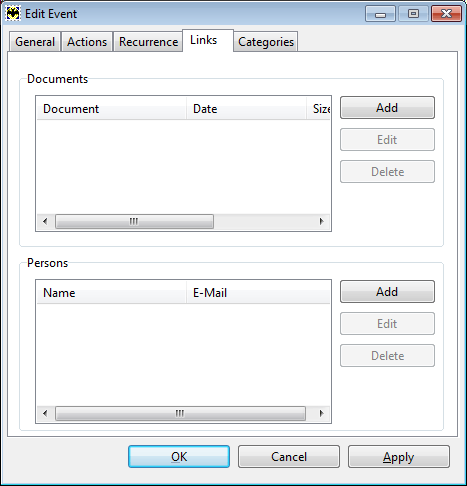
Categories You can add your own task categories (e.g. Personal, Work, Internet, etc.). To add a category, specify its name and handle. On the memo tab, you can add a descriptive text. 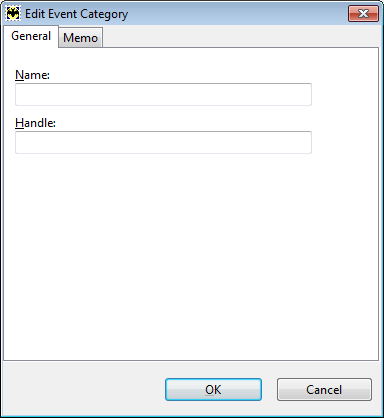
|
| RSS |
|---|
|
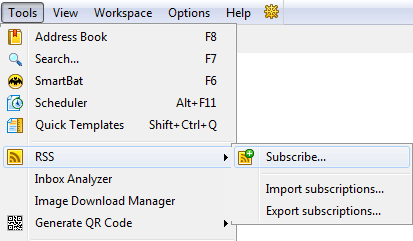
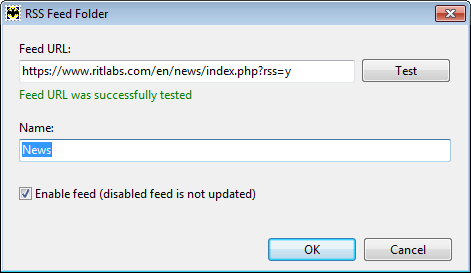
RSS is a technology that allows fetching news published on web-sites, blogs or forums. If you subscribe to RSS feeds in The Bat!, all the news and forum posts will be automatically fetched, combined and displayed in one list just like the ordinary emails are. This significantly increases the efficiency of your work, as you no longer need to visit web-sites or forums for updates. To subscribe to an RSS feed, you should copy its URL and add it to The Bat! Let’s take a look at subscribing to RSS feed available on our website:
RSS Feed Subscriptions are updated at program startup and periodically every 10 minutes, which allows following news in all your RSS subscriptions. News is marked as read when it is being read for 2 seconds. You can change these account settings under the Account -> Properties menu or on the Information message list tab. 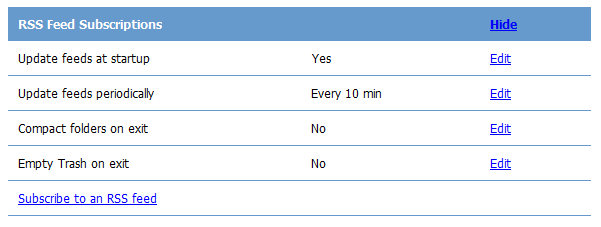

You can also enable the "Empty Trash folder" and "Compact all folders on exit" options. If needed you can disable updating a feed by deactivating the "Enable feed" option under the Folder -> Properties menu. It is possible to import and export subscriptions into the *.opml format using the Tools -> RSS menu. You can create an RSS Aggregate folder using the Folder -> New -> RSS Aggregate Folder menu. It displays all the news from its subfolders. 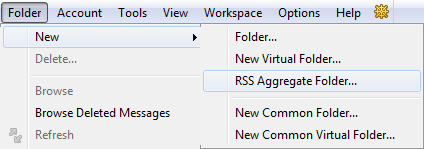
To move an RSS folder into an RSS Aggregate Folder select it and move it beneath the Aggregate Folder. Then invoke the context menu and choose "Move In" (Shift+Ctrl+Right). You can subscribe to an unlimited number of RSS feeds and follow the news directly in The Bat! |
| QR Code Generator |
|---|
|
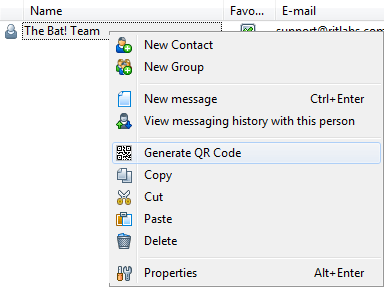
QR Code Generator allows creating QR codes which represent black modules arranged in a square pattern on a white background. QR Codes contain encoded information. Using mobile device camera and QR Code scanner you can quickly decode such information. QR Code Generator allows transferring text information from The Bat! into your mobile device or tablet directly from the screen of your monitor. You can encode any text – Email addresses, phone numbers, quotations from messages, address book contacts and so on. Here are some of the tasks you can do while using the QR Code Generator:
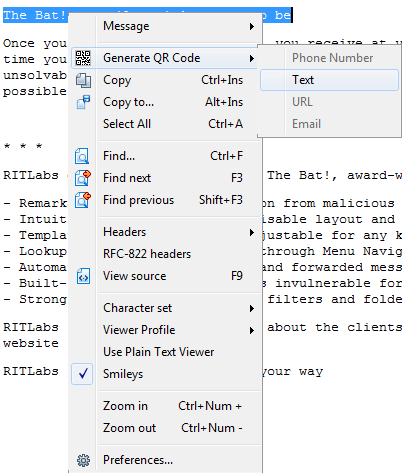
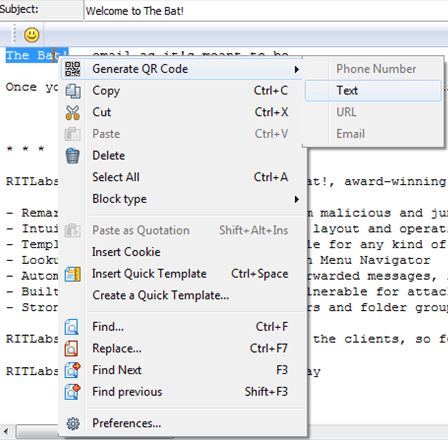
QR Code Generator can be accessed when the selected text is in the following program areas:
For example, if you received an email with a request to call the given phone number, you can right-click the number and choose Generate QR Code -> Phone Number. The program will generate a code containing this phone number. Once you scan it using the mobile phone camera, you can quickly dial it or add to contacts. 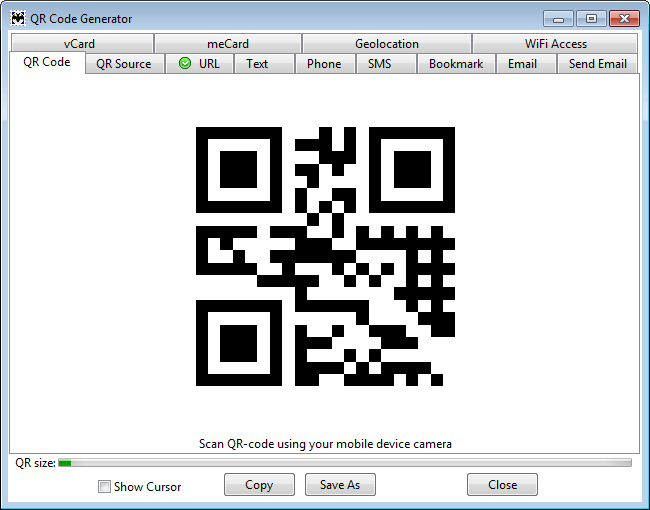
QR Code Generator form contains the following tabs:
For more information, see the article in the Tips and Tricks section. |

| Export and Import Messages |
|---|
|
The Bat! can import and export messages. To export messages use the Tools -> Export messages to menu and select one of the formats: Message files (.MSG), Message files (.EML), UNIX Mailbox. To import messages, use the Tools -> Import messages menu and select one of the options: from .MSG/.EML-files, from UNIX-mailboxes, from The Bat! message base v2 (.TBB) or from The Bat! message base v1 (.MSB). If you want to import messages from another mail client, select the "Mailbox Import Wizard" option. For more information about message import check out the article. |
| Synchronization |
|---|
|
Some of us use two or more computers every day, which makes it necessary to synchronize data stored in The Bat! The program offers a tool that allows synchronizing data on two computers that have full access to a shared folder. Start The Bat! and access the Tools -> Synchronize menu on both computers. 
Select those elements that should be synchronized. If you want to synchronize certain folders only, check the "Let me specify the folder list" box. Click the "Browse" button and point to the shared folder on both computers. Click OK to start the synchronization process. Accounts, folders and messages will not be duplicated when synchronized – Only the missing information will be added in both copies of the program. |