Save Attachments Automatically
In The Bat! email client, you have multiple ways to quickly and easily save attached files:
- Save all attachments from multiple selected messages;
- Automatically save attached files from incoming messages.
You can also configure a mail account to store all attached files in a separate folder on the disk, so each attachment will be a standalone file rather than encoded in a message body using Base64.
Save all attachments from multiple selected messages
Saving all attachments from multiple messages is very easy: just select several messages and click right mouse button on the selection, and choose "Attachments" from the contextual pop-up menu. You will have two options: "Save all" and "Save all to...":
- With "Save all", you will be given a separate File Save Dialog where you will be able to specify destination file name and location.
- With "Save all to...", you just select the destiation folder on the disk and The Bat! will do everything for you.

Automatically save attached files from incoming messages
You can also configure The Bat! email client to automatically save attached files from incoming messages. Do the following steps:
- Select Account -> Sorting Office/Filters from the main menu. The Sorting Office dialog will open.
- Create a new filter (File -> New Filter).
- Set the name for this filter "Extract all attachments".
- In the Condition field, configure the desired conditions: from which of the incoming messages do you want to save attachments. For example, you can replace the default condition ("Sender") to "Any message" if you want to save attachments from every message that arrives. You can simply delete the default condition and add the new one, or click on the default condition, and replace it. Alternatively, you can specify your own conditions. You can also go to the "Options" tab and specify "Continue processing with other filters", if you want other filters to be processed after this one. In this case, move the filter to the first position in the list as the filtering goes top-down.
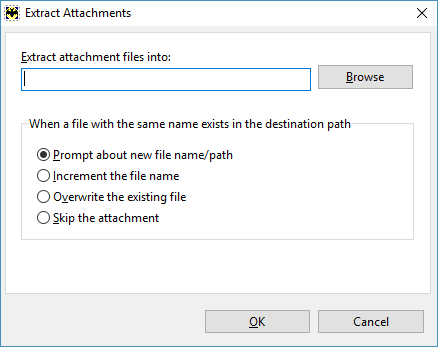
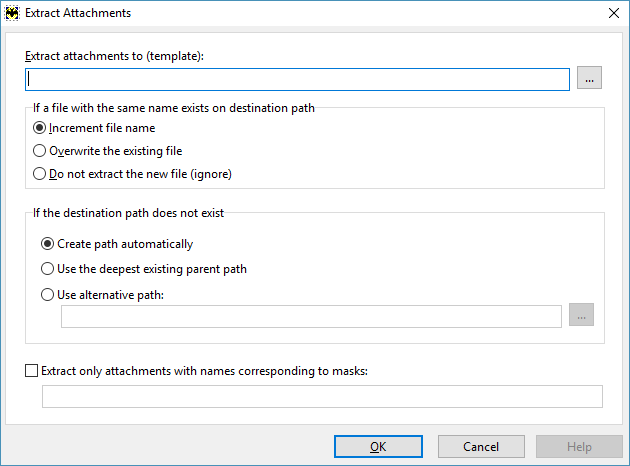
- In the Actions field, click "Add" and select "Extract Attachments". A dialog window will open.

- In the "Extract Attachments" dialog window, specify the destination folder. You can use macros in the field in this dialog that specifies the destination folder on the disk, for example to have different folders depending on the sender, date, etc.
- You can also configure what to do if a file with the same name already exists in the destination folder. There are options to increment file name, overwrite existing file or do not save the file at all.
- You can also specify to extract attachments that correspond to certain file masks (using "?" and "*" wildcards). You can specify multiple file masks, coma-separated.
Store all attached files in a separate folder
You can keep your attachments either in the message bodies or separately in a special directory (folder on the disk). This is a per-account configuration. If you choose to store them separately, The Bat! will automatically move attachments as files into a specified directory and will remove them from the message body, once you receive a message that contains attached files. This will save disk space and will allow to operate the files directly in this directory. To configure this, select Account -> Properties in the main menu. The Account Properties dialog will open. Go to the "Files and Directories" section and select to Keep Attachment Files "Separately in a special directory".